Pages

Thursday, May 30, 2013

Love Dreams!

Let me introduce you to the most delicious dessert you will ever meet...


This little delight is a Love Dream. A Love Dream is basically what you may know as a gooey butter cake. The recipe is slightly different than many gooey butter cake recipes I have seen (mainly it does not use vanilla extract), and in my opinion it is the absolute best. Plus, how could you not love a dessert called a Love Dream?!

They are cakey, ooey, gooey, creamy, sweet, sugary, oh my....I could go on and on. I could literally sit down and eat about 5 or 6 at once. If you think I am kidding you must not know me very well and/or you have never tasted the joy that is a Love Dream.

Love Dreams

1 box yellow cake mix
3 eggs
1 stick butter melted
1 package cream cheese, softened (8 oz.)
1 box confectioner's sugar (16 oz.)

Mix together cake mix, one egg, and melted butter to make a stiff dough. Press into a greased 9x12 pan. In another bowl beat together the two remaining eggs, cream cheese, and confectioner's sugar, reserving about 1/8 cup of the sugar. Pour over dough in pan. Bake at 350 degrees for about 35 minutes until the top is golden brown. Sprinkle the top with remaining sugar immediately after removing from the oven. Let cool overnight before cutting.

This is my mother-in-law's recipe and I remember her telling me once that she cut it out of the newspaper many years ago. So, whoever submitted this recipe to a newspaper long ago, thank you! And thank you to my fantastic mother-in-law for introducing me to the yumminess that is Love Dreams!

Tuesday, May 28, 2013

A Picture is Worth...

A thousand words actually its priceless. Hubby and I were so thankful to have one of my very best friends, Crissy, take some maternity pictures for us. We spent a fun morning at Maymont Park here in Richmond soaking up the sun, doing way more hiking and walking than we planned, and taking some pictures.

It was not only really special to have a good friend take these pictures for us, but it made things way easier when I felt like a total dork posing and pasting on my smile. Especially when we were around tons of people.....Don't worry about me I'm just lounging on the rocks like a beached whale pregnant model. Oh excuse me, you can't walk across these stepping stones right now because there is a photo sesh taking place. Be out of your way in just a moment!

There were so many good pictures that it was hard for me to only pick a few to share with you all, but I did my best.

I think this one is my ultimate fave:


When Crissy shared this picture on FB she said it "captures my pregnancy", which I really love, and when I think about it its pretty true. I have had plenty of ups and downs, and I haven't felt amazing every single day, but this pregnancy has been such a blessing and positive fun experience. I attribute it to keeping a positive grateful attitude, finding {or at least trying to} the positives in every situation, and drinking a ton of water {hey, I think it makes a difference!} :)

Here are a few others I loved:


And as some of you may know, hubby and I like to be goofy together...


Didn't Crissy do an amazing job?! It's hard to believe photography is just a hobby for her. I love how all of the pictures turned out. She does have a business though...


Check out that beautiful quilt I am laying on! It was made by Crissy as a gift for Emma. I just love it! Check out her Facebook page here.

I hope you enjoyed getting a peek at our maternity session. It's hard to believe that the next pictures coming up are Emma's newborn pictures! Yikes!

Monday, May 27, 2013

Say What, Grilled Salad?!

When making our grocery list this weekend, hubby and I really tried to think of items we already had at home that we could turn into meals. With it being the end of the month the grocery budget was looking slim (read my post about budgeting here), and we wanted needed to challenge ourselves to keep the grocery bill small.

Side note: This is the kind of fun part of having a budget and sticking to it...we are forced to be creative, and it feels really good to know we are not being wasteful because we are using items that would otherwise get ignored or go bad sitting in the pantry.

Our challenge: A package of frozen chicken breast tenders and week old crusty white bread
BTW--the bread was left over from some rocking Mediterranean paninis. Long story short...slice and butter your bread. Fill with slices of fresh mozzarella cheese, roasted red peppers, and olive tapenade. Grill on a panini press, George Foreman, or in a plain old pan!

The solution: Grilled Chicken Caesar Salad

The result: Total deliciousness! 


The Ingredients:

Stale crusty bread
Salt
Pepper
Garlic powder
Olive oil
Chicken breast tenders
Caesar dressing
Romaine hearts
Shaved parmesan cheese

The recipe:

Croutons
Preheat the oven to 375 degrees. Cut your stale bread into cubes. Put the bread cubes onto a baking sheet and brush (or drizzle) with olive oil. Season with salt, pepper, and garlic powder to taste. The more seasoning the better, in my opinion. Bake for 20-25 minutes or until golden brown.

Salad
Rinse and pat dry your chicken tenders. Put them into a bowl with some caesar dressing to marinate. *We used a vinaigrette based caesar. I am not sure how creamy caesar would grill up...probably not well.

Cut your romaine hearts in half, leaving on the bottom core to keep the lettuce together. Brush both sides of the romaine with olive oil and season with salt and pepper.

Once your grill is preheated (medium-high to high heat) put your chicken tenders on to start grilling. Once they are halfway done put on your lettuce. You will grill the romaine until it has a light char on both sides.

To serve--Cut off bottom core from romaine hearts and put onto your plate. Top with several grilled chicken tenders, homemade croutons, and shaved parmesan cheese. Drizzle with dressing and enjoy!

Here is the dressing that we used:


I know that ideally homemade dressing is the best, but sometimes you just need to go with bottled. Plus, do you know what the "secret" ingredient is in caesar dressing?! I don't like to think about it, and I am certainly not going to try and make it myself! I love buying Newman's Own dressing when I get the bottled stuff because it is all natural and the profits go to charity...win, win!

I served the salads with some fresh watermelon for a light summer meal. I had fun pulling out our summer picnic ware to create a nice dinner on the deck for me and hubby!


Have you ever grilled lettuce? It was a first for us and we loved how it turned out. Yum!

Monday, May 20, 2013

A New Fave & 2 Recipes

Breakfast is usually a hard meal for me to figure out. I need something filling with protein to get me through the morning, but I am perpetually running late, and I never have the time or energy to bother with an elaborate breakfast.

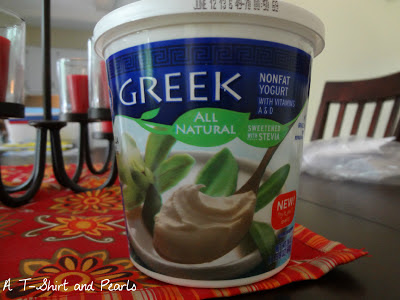
Recently I have been enjoying a yogurt parfait for breakfast. I make it with my new fave yogurt, Kroger brand {fat free} vanilla greek yogurt sweetened with Stevia. I love that it is quick to make, and if I am really running late I can throw it in a container and take it to work with me.

Reasons I am obsessed with this yogurt: it has the perfect amount of sweetness and vanilla flavor, it is loaded with protein, it is fat free, it is all natural, and it is sweetened with Stevia! Stevia is a plant based calorie free sweetener that is considered a safer alternative to artificial calorie free sweeteners. Although I have recently read several articles that claim Stevia is not as safe as people believe...who knows...at this rate anything and everything we are exposed to is toxic, unless you live a 100% clean eating lifestyle, which as much as I would love to, is insanely hard to do.


Once I get some of my yummy yogurt into the bowl I top it with Kashi GoLean Crunch cereal (also high in protein) and fresh fruit. Last week's choice was cantaloupe. The cantaloupes I have had so far this year are already so sweet and juicy, yum! I have also used blueberries, strawberries, and pineapple to make my parfaits. Here is a past post about a blueberry yogurt parfait I made.


Because I was so excited about my yogurt I decided to try it another way by making a delish dip I found via Pinterest.


This dip combines vanilla greek yogurt, honey, cinnamon, and peanut butter. I used mine as a dip for apples, but honestly it was so delish I could just eat it with a spoon for dessert. As is typical I didn't measure. I just spooned a little of each into a dish and mixed it up, but here is the source where I got the recipe and she shares her measurements.

Do you have any other yummy ways you use vanilla greek yogurt? Now that I am obsessed with it I am anxious to try it in some other recipes. What about Stevia? Do you use it or do you prefer another natural sweetener?

FYI--This post was not sponsored. All opinions are unsolicited and 100% my own.

Sunday, May 12, 2013

Going Bananas!

Well, I am going bananas for two reasons. One, I just made a delicious Chocolate Chip Banana Oatmeal Bread, and two....read to the end of my post and see.

I was recently faced with the problem of 2 over ripe bananas. I thought about making my Healthy 3 Ingredient Cookies, but decided to switch it up and make something heartier instead. I decided on an oatmeal banana bread.

I found this Weight Watchers recipe, and changed it up a little to make it what I wanted.

Chocolate Chip Banana Oatmeal Bread

1 1/4 c. all purpose unbleached flour
1/2 c. light brown sugar
1/2 tsp. salt
1/2 tsp. baking soda
1/4 tsp. baking powder
1 tsp. cinnamon
3 tsp. canola oil
1 egg, beaten
2 egg whites, beaten (not to peaks or anything...just mix 'em up with your fork a little)
1 tsp. pure vanilla extract
2 large over ripe bananas
1 c. uncooked old fashioned oats
1/2 c. mini chocolate chips

Preheat oven to 350 degrees and grease a loaf pan, set aside. In a large bowl mix together all dry ingredients. Add in eggs, oil, and vanilla extract, and mix well.

In a small bowl mash the bananas with a fork. Add bananas, oatmeal, and chocolate chips to the batter and mix well.

Pour batter into the greased loaf pan and bake 40-50 minutes until the top is golden brown, and a knife inserted into the center comes out clean.


This bread was super delicious! Not quite as healthy with the chocolate chips added, but chocolate makes everything better, and if you don't believe that then I am very sorry because you are missing out. I also love that this recipe is really simple. Don't get me wrong, I love my Kitchenaid mixer, but the dang thing is so heavy to drag around. It's nice to throw everything in a bowl, mix it up, and be done.

I am a total dork, because as I started writing this post it made me think that I remember making a bread like this one other time. Well friends, I did. Click here to read my post about my Low Fat Oatmeal Banana Nut Bread. I liked this version better because of the chocolate, much easier recipe, and while still dense it did seem to be more moist than my other version (if I am remembering correctly!). Reason number two that I am going bananas. As in...Losing.My.Mind.

Enjoy!

Monday, May 6, 2013

Bonnets, Birdies, and Pearls

First...holy cow, I can't believe it's been a month since I have chatted with you all!!! I have been so consumed with enjoying (and checking things off of the to-do list) during these last few months of pregnancy, that the blog has fallen to the bottom of the list. Although, the thing I love about blogging is that even when I take a break it is still here waiting, and all of my bloggy friends are still out there too (I hope!).

A few weekends ago I had my baby shower. It was the most amazing weekend full of family, friends, good food, and of course fabulous baby goodies!

Two of my aunts hosted the shower, and it was held at my parent's house which means my mom was a huge part of the planning and preparation too. I can't even begin to describe the love and time that these three put into the shower.

Here are the girls...me, my mom, Aunt Kathy, and Aunt Darlene:


Here are some picture highlights of the theme and decorations. If I can get my act together I'll post a part 2 with more shower fun!

The entry way; thank you note station where guests addressed their envelopes (by the way...I AM working on those...40 thank yous is a lot to write!), filled out their note for mom and baby, and got their little clip for the baby game; the favor table--amazing handmade baby booties filled with chocolate, and yummy homemade sugar scrub in the cutest packaging you have ever seen.


The most fabulous diaper cake and sweet little bloomers, and a fun pink and pearl wreath!


The main room. The hosts and guests brought lots of sweet little bonnets and hats, several of which were displayed. There were also lots of pictures of hubby and I as babies, and of course everything was dripping with pearls. The centerpiece was the most beautiful bouquet of tulips and hydrangeas from the same florist that did my wedding, Richardson's. Their flowers are always amazing!


Since I am not big into party games there was a craftivity instead! Guests used the materials provided to make onesies for Emma. There were tracers, embellishments, fabric markers, and iron on fabric to create one of a kind designs.


Mmm, dessert! I had the most beautiful (and delicious!) cake which came from the same bakery that made my wedding cake, Desserts by Rita. The cake balls were even done in the same flavors of the layers that made up my wedding cake. What a sweet touch!


Some pretty pink dogwoods to add a touch of spring!


I hope you enjoyed a peek into my shower. It was such a wonderful and special day! Thank you to everyone who was a part of it.